TeamTasewa's Expense Tracker - Version 3
Overall diagram

Subsystems
Login/Sign Up Subsystem:
When the user first accesses the application, they will see the welcome page. This page has two buttons - sign up and log in.
If the user already has an account, they can click on the ‘Login’ button; they will be redirected to the login page where they can enter their credentials. These details will be verified with the data in the database.
If there is a match, the user will be redirected to the dashboard.
If there isn’t a match, the user will be notified of the wrong entry and will be prompted to enter the details again.

If the user doesn’t have an account, they can click on the ‘Sign Up’ button; they will be redirected to the sign-up page where they can enter the details required to create an account.
These details will be stored as a new entry in the database
Once the details have been stored, the user will be redirected to the dashboard.

This subsystem also provides a function that enables the user to view their profile details; this can be accessed through the dashboard, through the user profile page.
A ‘Logout’ button is also present on the user profile page that redirects the user to the welcome page.

Expense Tracker Subsystem:
This subsystem manages the expenses and income of the user.
There are 2 pages - the expense page and the income page
On each page, there are two text fields - one to enter the expense/income name and one to enter the expense/income value.
The following buttons are present on these pages:
Add button
Edit button
Delete button
Upon clicking the ‘Add’ button, the data entered in the text fields will be displayed in the expense/income list on the page. The data entered will be stored in the database as an expense/income object.
Upon clicking the ‘Edit’ button, the existing data (the expense/income name or value of that particular item) can be changed.
Upon clicking the ‘Delete’ button, the selected item will automatically get removed from the list and will also get deleted from the database.


In dashboard there is a balance button and when it is clicked the user will be redirected to new page where the balance will be displayed.
Formula: (total income - total expense)
When changes to the income or expense are detected, the new income total and expense total are calculated. These new values are used in the above formula to calculate the new balance value.
This balance value is displayed in the balance section and is updated in the database.
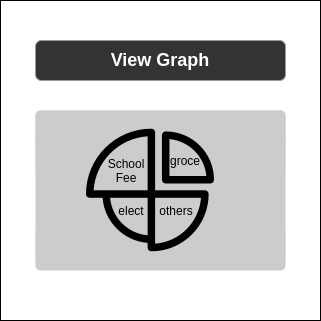
Graph Subsystem:Displays the income-expense graph.
When changes to the income or expense are detected, the new income total and expense total are calculated.
These new values are used as inputs to create the graph.
The graphs are displayed month-wise, based on the values entered in a particular month.

If the user doesn’t have an account, they can click on the ‘Sign Up’ button; they will be redirected to the sign-up page where they can enter the details required to create an account.
These details will be stored as a new entry in the database
Once the details have been stored, the user will be redirected to the dashboard.

This subsystem also provides a function that enables the user to view their profile details; this can be accessed through the dashboard, through the user profile page.
A ‘Logout’ button is also present on the user profile page that redirects the user to the welcome page.

This subsystem manages the expenses and income of the user.
There are 2 pages - the expense page and the income page
On each page, there are two text fields - one to enter the expense/income name and one to enter the expense/income value.
The following buttons are present on these pages:
Add button
Edit button
Delete button
Upon clicking the ‘Add’ button, the data entered in the text fields will be displayed in the expense/income list on the page. The data entered will be stored in the database as an expense/income object.
Upon clicking the ‘Edit’ button, the existing data (the expense/income name or value of that particular item) can be changed.
Upon clicking the ‘Delete’ button, the selected item will automatically get removed from the list and will also get deleted from the database.


In dashboard there is a balance button and when it is clicked the user will be redirected to new page where the balance will be displayed.
Formula: (total income - total expense)
When changes to the income or expense are detected, the new income total and expense total are calculated. These new values are used in the above formula to calculate the new balance value.
This balance value is displayed in the balance section and is updated in the database.
Displays the income-expense graph.
When changes to the income or expense are detected, the new income total and expense total are calculated.
These new values are used as inputs to create the graph.
The graphs are displayed month-wise, based on the values entered in a particular month.
Though all these subsystems use expense and income data to perform their functions, there is no actual connection between all three subsystems. Each subsystem performs its functions independently. To integrate all these subsystems into a single system, a dashboard is created, from which each subsystem can be accessed through a click of a button.

To move from one subsystem to another, the user should come back to the dashboard by clicking on the 'Back' button and then select the next subsystem.
PostgreSQL follows the client-server model. To integrate the database into the subsystems, a connection string should be created for the PostgreSQL client, to instantiate it for the PostgreSQL database.
Technology
- Web Application technology
- JavaScript
- PostgreSQL
- Node.js


Comments
Post a Comment